Saturday, July 31, 2010

July Workshop

These are a couple of the projects that we did at Kathy's July Workshop.

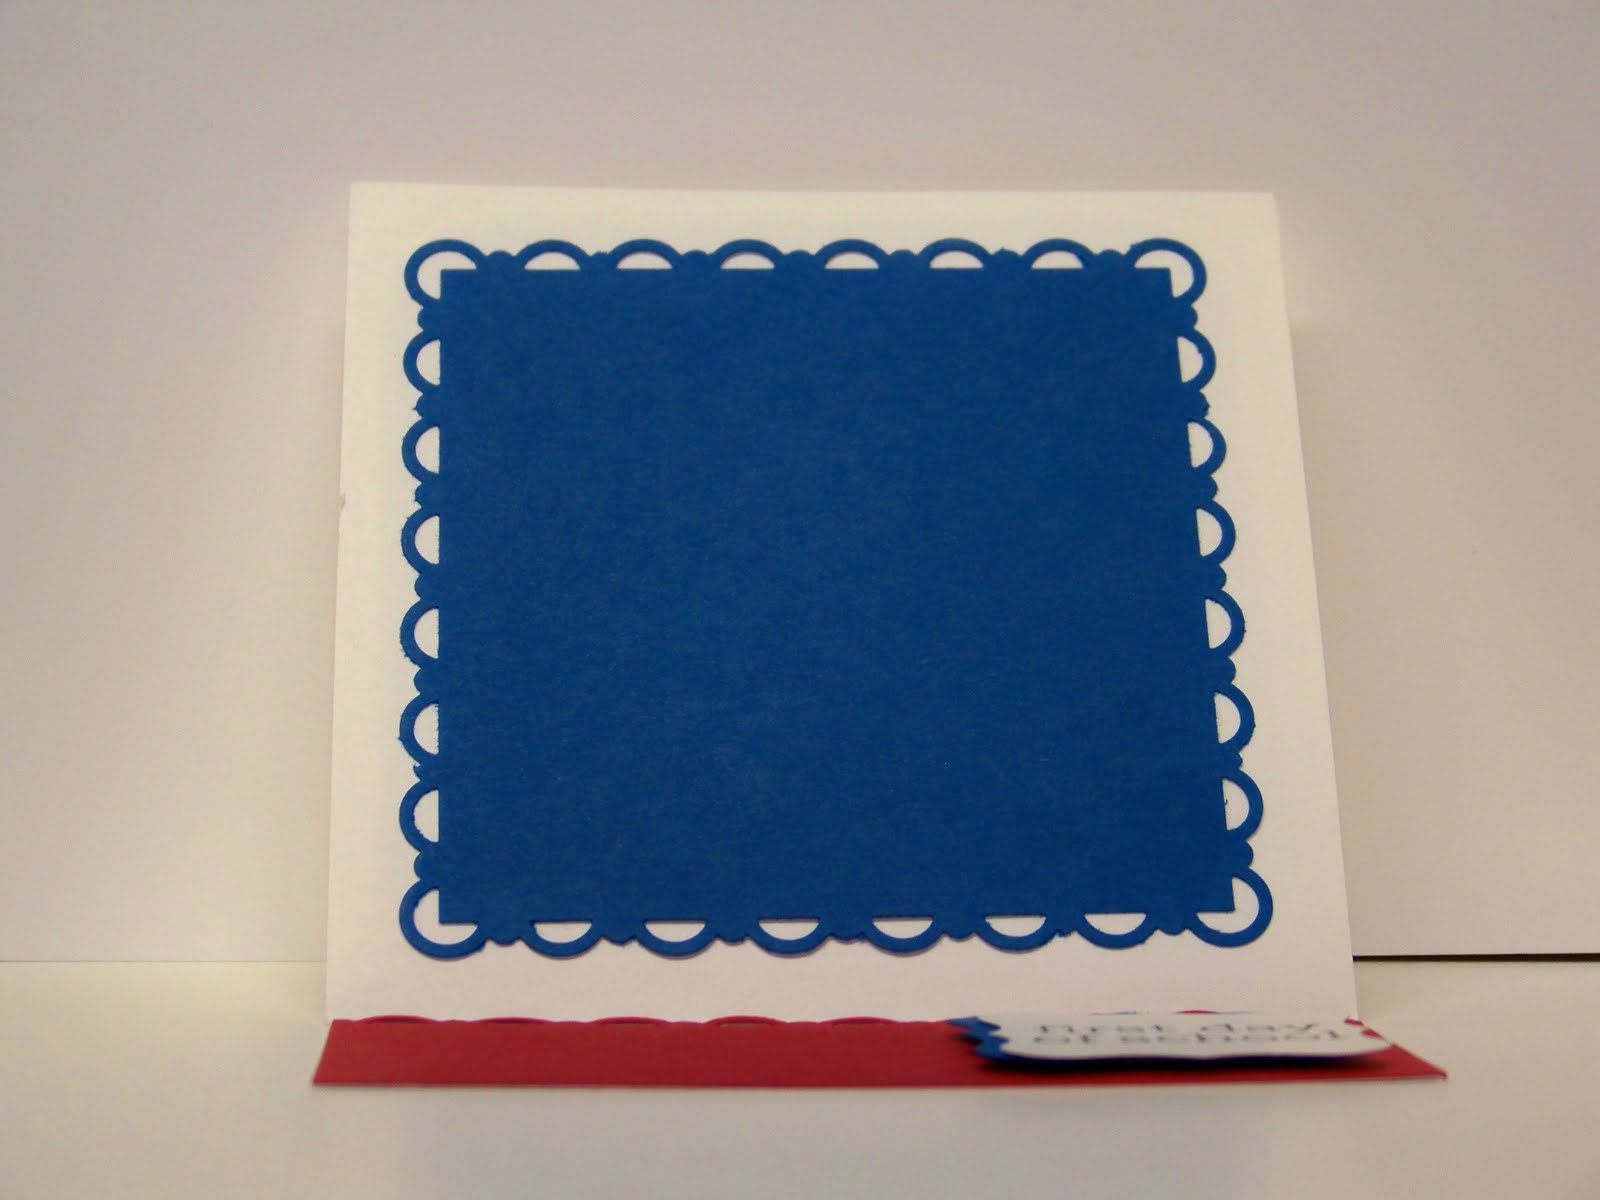
Back to School Easel Card
I CASE'd this template from my upline Kathy and change the colors to relay a grammar school feel. The base of the project is a 4 1/4" x 8 1/2" piece and a 4 1/4" x 4 1/4" piece of Whisper White Card Stock. Take the larger piece and fold it in half to make a square. Then take the top layer and match the front edge back to the folded edge and crease that fold. Place Sticky Strip on this very top 2 1/8" x 4 1/4" layer. Layer the square piece of Whisper White Card Stock on top of the Sticky Strip being careful to line up all edges. Using the Scallop Trim Border and Corner Punches I punched a mat from a 3 3/4" x 3 3/4" piece of Pacific Point Card Stock and layered that onto the top Whisper White layer using Snail Adhesive. To hold up the picture piece, I used a 2" x 4 1/4" strip of Real Red Card Stock that I punched using the Scallop Trim Border Punch and adhered that to the 4 1/4" x 4 1/4" bottom layer with Snail. The scallops help to lock the top edge into place and keep it from sliding flat. Finally, I stamped the "first day of school" image onto a piece of Whisper White Card Stock and puched it out using the Curly Label Punch. I layered that onto a Pacific Point Curly Label piece and adhered it to the Real Red strip with Dimensionals. The girls at the workshop thought this would be a really great gift for  Grandma and Grandpa or a desk at work.

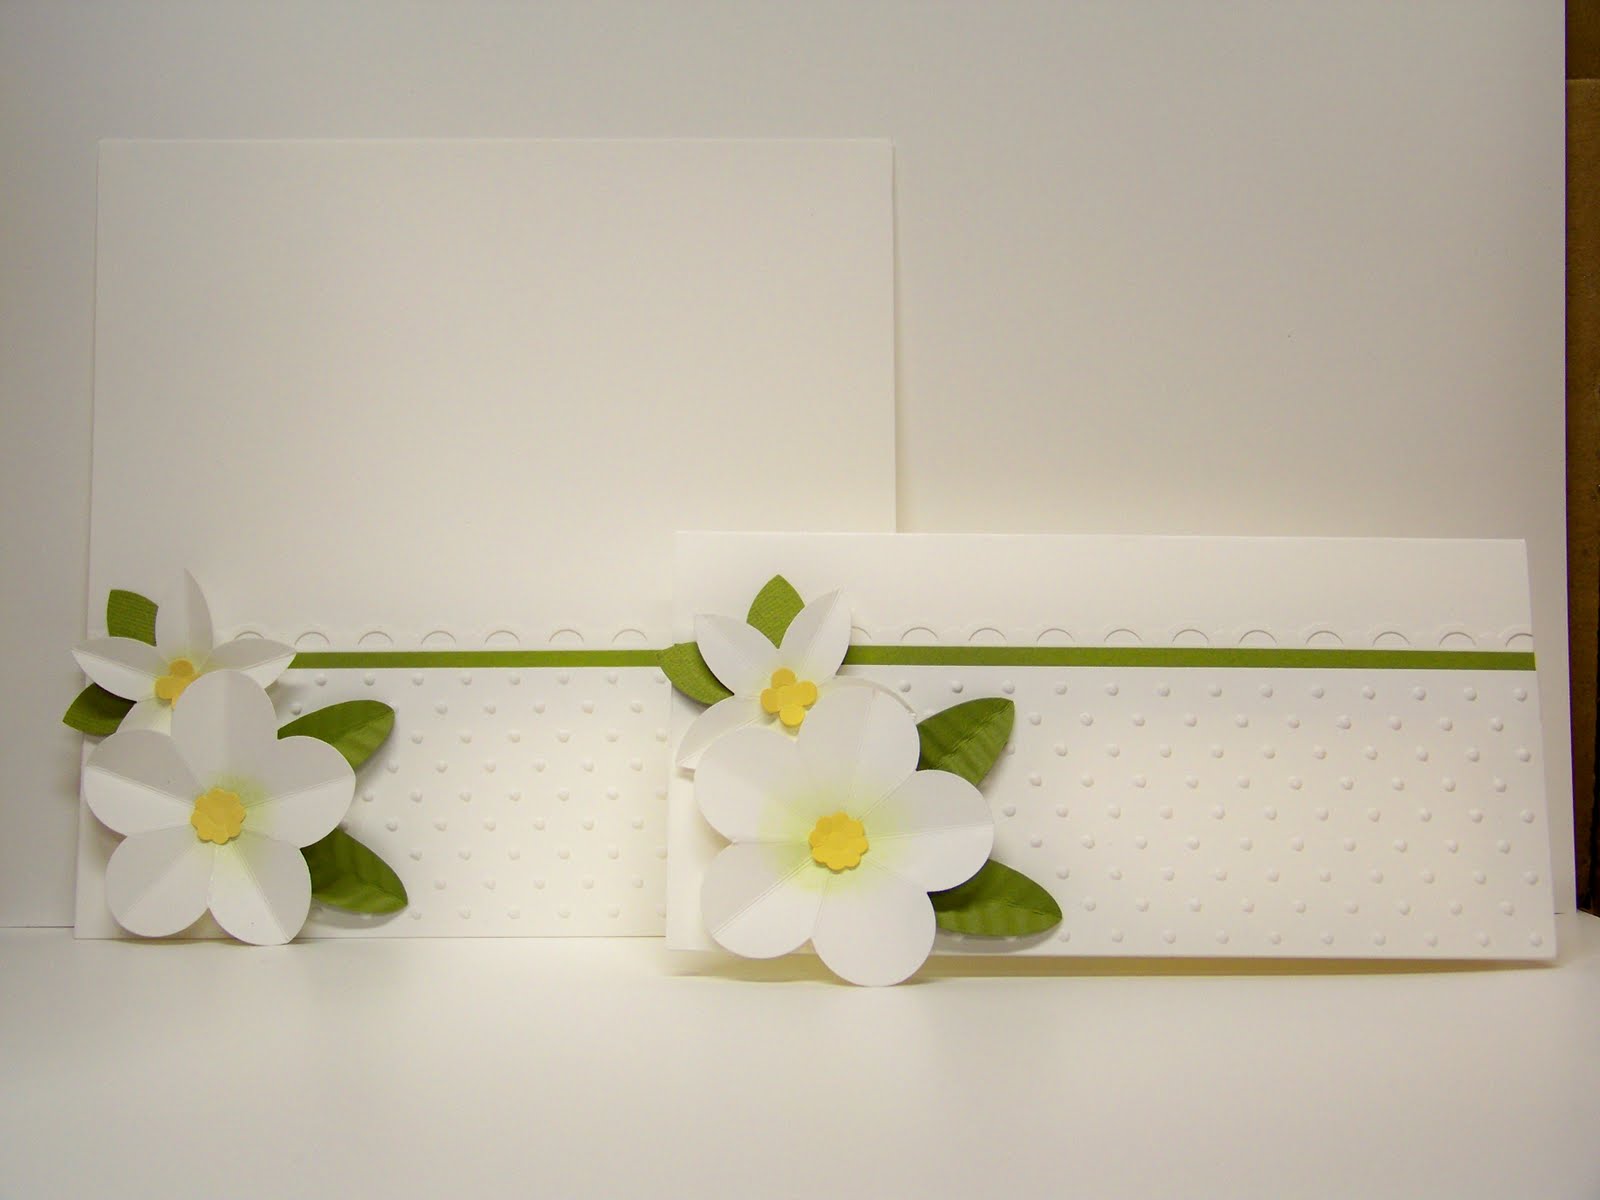
When my girlfriend asked me to Demo her Workshop she sent me a link and said, "Can we do this technique?" So clicked the link and there were these cards:
LeeAnn Gref's Instructions can be found here
So, of course, I said "Sure!" This is what I came up with...

Hummingbird
The base of this card is Tempting Turquoise Card Stock. To make this amazing color blend for the flower image I used a baby wipe in an empty Stamp Storage Case and with reinkers made my stamp pad. The colors I used are Melon Mambo, Rich Razzleberry, Tempting Turquoise, and Pacific Point. I inked the flower image from Elements of Style and stamped it onto Whisper White Card Stock. I layered that onto my card base. Then, I inked the hummingbird image in just the Melon Mambo and Rich Razzleberry ink and stamped that onto Whisper White Card Stock. I trimmed out the hummingbird with my Paper Snips and using Dimensionals adhered it to the corresponding colors of the flowers. To finish the card, I stamped the sentiment in Tempting Turquoise Classic Ink onto Whisper White Card Stock and punched it out using the Large Oval Punch. I then layered that onto a Scallop Oval of Tempting Turquoise Card Stock and adhered that to my card using Dimensionals. I just love how this card came out! The only thing that might make it a little better is some Smootch Spritz.

The last project I did at Amy's and Laura's Workshops in June. My oldest daughter is a Fourth of July baby so I always like to have an "Independence Day" themed page for her birthday pictures.

July Fourth
The base of this 6x6 scrapbook page is Whisper White Card Stock. For the first step I randomly stamped some of the fireworks image from the July Fourth stamp set in VersaMark and embossed with Iridescent Ice Embossing Powder. I love how the fireworks sparkle! I also stamped the small stars image using VersaMark onto a 2x6 strip of Real Red Card Stock to give the look of patterned paper. I also stamped the Happy 4th sentiment with Basic Black Classic Ink. I layered a strip of Night of Navy Card Stock behind the Real Red Card Stock and tied a piece of 1/4" Whisper White Grosgrain Ribbon around it and adhered the whole thing to the base. I used a 2 1/2" x 3 1/2" piece of Night of Navy Card Stock for the picture mat and puched out stars from Real Red and Whisper White Card Stock using the Large Star and Star (retired) Punches. I layered the stars with Dimensionals and also used Dimensionals to "pop" them off the corner of the mat. This really is a cute 4th of July page for any scrapbook.

Until next time...

Happy Stamping!

Katie

Friday, July 30, 2010

June Theme

This summer has flown by! With softball and swimming lessons, the kids have kept me busy. I did have the chance to demo three great workshops (Thank you Ladies!) over June and July and would like to share a few of the projects that we made.

BIG BIG NEWS!! The 2010/2011 Stampin' Up! Idea Book and Catalog went "live" on July 1st! It is packed full of great products and awesome ideas. Make sure to check out my Stampin' Up! Demonstrator Website to check it out!!! http://www.katiegallant.stampinup.net/

June is the Birthday month of my son, Jacob. His favorite color is orange so I made him this card.

happy birthday to you
For this Birthday Card I used Stampin' Up!'s Crazy for Cupcakes stampset. The base of the card is Only Orange Card Stock (retired). On Whisper White I stamped my cupcake and balloon images and sentiment in Basic Black. I then used the Color Spritzer Tool with Only Orange (retired), Tempting Turquoise, and Yoyo Yellow (retired) Stampin' Write Markers to add splashes of color to the Whisper White Card Stock. After giving that a moment to dry (it dries really quickly) I layered it onto my Only Orange card base with Snail Adhesive. I stamped a second image of the cupcake on Whisper White Card Stock and the balloon on Only Orange Card Stock. I also stamped the flame from the cupcake on Only Orange Card Stock. I colored my second cupcake image with Apricot Appeal (retired), Tempting Turquoise, Only Orange, and Yoyo Yellow Stampin' Write Markers. I then cut the image out with my Paper Snips omitting the flame. I layered that on top of the main cupcake image using Dimensionals and added the flame that I had stamped and trimmed from Only Orange Card Stock using a small piece of Dimensional. Finally, I trimmed out the balloon image I had stamped on Only Orange Card Stock, omitting the string, and layered that on top of the original image using Dimensionals.

June is also the month for Weddings so I thought this project was appropriate.

Wedding Page/Card
This gorgeous Wedding Page/Card idea I CASE'd from my wonderful upline Kathy. She is always so full of great ideas! For this project I gave my customers the option to keep this a 6x6 scrapbook page or fold it and have a 3x6 card. The cards fit great in Stampin' Up!'s Small Open-End Envelopes. The colors used are Whisper White, Old Olive, and So Saffron. The base of both projects is a 6x6 piece of Whisper White Card Stock. We ran a 2x6 strip of Whisper White Card Stock through the Big Shot using the Perfect Polka Dots Embossing Folder. A 1x6 strip of Whisper White Card Stock was punched along the edge using the Scallop Trim Border Punch. These were layered with a thin strip of Old Olive Card Stock in between them. This was adhered to the Whisper White base with Snail Adhesive. The flowers were punched from Whisper White Card Stock using the Fancy Flower Extra-Large Punch and the 5-Petal Extra-Large Punch. On each of the flowers I rubbed a small amount of Certainly Celery Classic Ink using a Sponge Dauber. I then scored lines on each flower from the V between each petal to the tip of each petal with a ruler and my Bone Folder. I folded mountain and valley folds on the score lines to give the flowers dimension. I also punched out two small "centers" from So Saffron Card Stock using the Scallop and the Flower from the Itty Bitty Shapes Punch Pack and attaced those to the centers with Mini Glue Dots. The leaves for the 5-Petal flower were cut from Old Olive Textured Card Stock using two petals of the 5-Petal Extra-Large Punch. To make the leaves for the Fancy Flower I folded a strip of Old Olive Card Stock in half and ran it diagonally through my Crimper. Then, on the fold, I punched two "half ovals" (the long way) and opened them up. The flowers and leaves were adhered to the card using Pop-Up Glue Dots (retired).

Hopefully I can find time to share some more tomorrow!

Happy Stamping!

Katie

Thursday, April 8, 2010

Big News at Stampin' Up!

The news is out! Stampin' Up! is revamping their whole color line. They are calling it their Color Renovation. Say goodbye to 30 current colors, hello to 5 brand new colors, and welcome back to 10 former in-colors. There will be 4 Color Collections (currently known as Color Families) each containing 10 colors. In addition there will be 5 new in-colors introduced every year and they will stay in the catalog for 2 years. For example, in July 2010 five in-colors are introduced, in July 2011 five more in-colors are introduced, in July 2012 the five 2010 colors will retire and five new in-colors will take their place, in 2013 the five 2011 in-colors will retire and five new in-colors will take their place, and so on. So, at any given time there will be 50 colors total available in the catalog. It sounds a little confusing but I think it will work out great! I can't wait to get my hands on the new colors of card stock so I can play!

Last month I created a couple of cards to share with some fellow Demonstrators at our monthly meeting.

Happy Easter


I created this card using the Picnic Parade clear mount stamp set in the Occasions Mini. I absolutely love this bunny! I also used the happy Easter stamp from Well Scripted that I purchased from the Occasions Mini. The base of my card is So Saffron card stock layered with Whisper White. I sponged Bashful Blue Classic Ink on the edges to give the allusion of sky. The yellow gingham patterned paper is from the Pawsitively Prints Designer Series Paper in the Build-a-Bear line. To create the weave I punched holes with the Double Rectangle Punch all across the top of the dsp and wove 1/4" Very Vanilla Grosgrain Ribbon from both ends and tied a double knot in the middle. I layered the dsp onto the Whisper White and the So Saffron. For the bushes I used the Scallop Circle Punch to punch one circle from Certainly Celery card stock. I ran the scallop circle through my Big Shot with the "flowery" texture plate from the Stampin' Backgrounds 1 Texture Plates. I then cut the scallop in half with my Paper Snips and adhered one half on the side and the other half at the top of the dsp sliding both slightly underneath the dsp. I stamped my images last using Staz-On. Using the clear mount stamps made it so easy to place my images exactly where I wanted them. Lastly, I colored my images using the Watercolor Pencils and Blender Pen to create the water colored effect.

Mom's Butterflies


For this butterfly card I used the Messages for Mom clear mount stamp set found in the Occasions Mini. The base of the card is Whisper White card stock layered with Melon Mambo Patterns Designer Series Paper. I used the new Scallop Trim Corner Punch (Occasions Mini) and the Scallop Trim Border Punch (sale-a-bration mini) to create the border around the Shimmery White card stock layer. I stamped my images with Staz-On and colored in the flowers using a Blender Pen and Melon Mambo Classic Ink, Bermuda Bay Classic Ink, Green Galore Classic Ink, and Summer Sun Classic Ink. For the butterflies I used Melon Mambo and Bermuda Bay card stocks and cut the images with the Beautiful Butterflies Embosslits Die. I added a little Champagne Mist Shimmer Paint to the butterflies before I adhered them with Mini Glue Dots and lifted the wings a little for a 3-D effect.

If you have any questions about these projects please let me know.

Happy Stamping!

Katie

Monday, April 5, 2010

Easter Gifts

I saw these adorable bunnies on Stampin' Connection (a website just for Stampin' Up! demonstrators) and knew I had to make some! My kids gave them as teacher gifts for Easter.


Tuesday, March 23, 2010

Wow...It's been a long time!

It has been a very long time since I've had the opportunity to update my blog. Finally, with all 4 kids in school, I can take some time to focus on what I love to do...Paper Crafting! I used to say stamping, which I love, but I've expanded so much broader than stamping. And, sometimes my creations don't have a lick of stamping on them.


Have you seen these "Garden Giggles"? I bought the tutorial from Gretchen Barron on her
website http://www.gretchenbarron.typepad.com/ scroll down and you'll find them. She has the cutest projects. Well my friend Kathy and I spent a very good part of this past Saturday making them. They are so adorable! My only qualm is that they look so sad. Except for my ladybug. I changed the points of her eyes to get a different expression. Boy did I ever! She looks mad! I am going to have to work on that. I love these bug-wuggies so much that it's going to be hard to give them away.

All products used to make these bug-wuggies are Stampin' Up!. Except for the ribbon, which I didn't have and got from Kathy. Also, the snail, I did not have the die to make the spiral cut so we decided to layer circles to mimic the shell. I hope you love them as much as I do!

Happy Stamping!

Katie

Tuesday, April 8, 2008

Spring is still far far away!
It was hard to get inspired for March's Club projects. Winter has lasted way too long here and every Wednesday and Saturday we would get another snow storm. Very depressing, and about the only thing I wanted to do was crawl into bed and hybernate until the snow was all melted. At the beginning of March I had sent around a scrapbook challenge to the Club and the Sunday before we met, figured that I should probably step up to the challenge myself! That helped to jump start my creative juices and after searching the IB&C and the Occassions Mini finally came up with these:
Thanks Tons
For this card I can't find where I CASE'd it from. So if you recognize it Thank You! The base is a 6x6 piece of Bashful Blue Cardstock folded to make a 3x6 card. On top of that I layered a piece of Summer Picnic Designer Paper from the Occassions Mini. I also layered a piece of Real Red Cardstock stamped with the large Thank You stamp from Thanks Tons in Real Red Ink. I threaded some Old Olive Ribbon also featured in the Occassions Mini through a Silver Flower from the Silver Hodgepodge Hardware. I attached that to the front of the card and stamped my sentiment from Thanks Tons in Basic Black Ink and the card was finished! You could also use the small flower from Thanks Tons next to the sentiment to tie the flowers together. Easy card but really cute.

Star Thank You
I really wanted to incorporate one of the new rub-ons at this month's club so I found this card in the IB&C on page 146. It really is similar. Tha base is 3x6 Wild Wasabi Textured Cardstock folded for a 3x3 card. The wide strip is Rose Red and the thin strip is Pumpkin Pie. I stamped Thank You from Greetings Galore and layered that on. The square is Blue Bayou and I punched out the space using my Word Window Punch. I layered that on top using Dimensionals and centering the window over the Thank You. I used the white Star Rub-on from Anchored and rubbed that onto a piece of Pumpkin Pie Cardstock. Then I cut around the Star using my Paper Snips. That was attached with Dimensionals as well. Two of the cicles were punched from Soft Sky Cardstock usind the 1/2" Circle Punch and attached with Dimensionals. The Heart from Thanks Tons was stamped on Whisper White using Rose Red Ink and Punched with the 1/2" Circle Punch. It was also adhered with a Dimensional.
Soft Sky
For this card I really wanted to use my new Priceless Classy Brass and Light Table so I found this card on page 187 in the IB&C. The base of the card is Bashful Blue Cardstock stamped with the Priceless Outlined Flower in VersaMark. I stamped the Swirl on a strip of Certainly Celery Cardstock with Certainly Celery Ink. Using Close to Cocoa Cardstock I Dry Embossed the Larger Star Flower omitting the outline and dots. I layered to Cocoa on the Celery and tied a piece of Kraft Taffeta Ribbon around them. Then I layered the Celery onto the Bashful Blue card base. I finished the card by stamping So Kind on the front in Basic Black Ink.
Until Next Month...Happy Stamping!

Friday, February 22, 2008

A Good Egg!

We had our February Club last night. I am so glad it is over. This has been school vacation week and with the addition of 2 new puppies the week has been very stressful (and way too long). Despite the lack of inspiration and creativity for this month's Club Workshop I think the projects came out pretty nice.


Origami Box
One of my Club Members had requested a box for one of our projects. This Origami Box is fun to make and requires no cutting and adhesive is optional. A tutorial for the box can be found here: http://www.splitcoaststampers.com/ee/index.php/resources/tutorials/origami_box/
For my box I used Petals and Paisleys Designer Paper (retired) and Pretty in Pink Wide Grosgrain Ribbon.

A Good Egg
The girls loved this Egg Card for Easter. It requires some detail but the end result is well worth it! I cut Almost Amethyst Card Stock to 5" x 8 1/2" and folded it in half. Using my Coluzzle I cut the largest oval leaving a small portion of the folded edge in tact to hinge the card. I trimmed off about a 1/4" off the bottom so the card would stand up. I stamped the card base in Almost Amethyst Ink using the solid polka dots from A Good Egg stamp set. I stamped in Basic Black Ink on Whisper White CS using the dots and flowers stamp and water colored in my flowers. I layered the WW strip onto Certainly Celery Patterned Paper and adhered the strip to the Egg base. I stamped the Hatching Chick in Basic Black on Apricot and cut him out with my Paper Snips. I stamped his Eggshell on Blush blossom and cut that out as well. I adhered the egg to the chick and used Dimensionals to stick him to the flower strip. I stamped Happy Easter in Basic Black on Certainly Celery and punched it out with my Word Window punch and also adhered that with dimensionals. Last I tied a bow using Whisper White Narrow Grosgrain Ribbon and stuck that on with a Mini Glue Dot.


So Many Scallops
This month is Sale-a-bration and one of the sets is So Many Scallops. I love the Sweet One stamp in this set. I gave the girls a choice of using Pretty in Pink or Bashful Blue for their card. This card base is Pretty in Pink. I cut a layer of Whisper White Textured Card Stock but before layering I scored 3 vertical lines (using my paper cutter and bone folder) at 3/4", 1", and 1 1/4". You can't see it in the picture but it really adds some nice detail to the card. I tied Pretty in Pink Taffeta Ribbon around the WW CS before adhering it to the card base. I stamped the Sweet One stamp on Pretty in Pink Card Stock with Pretty in Pink Ink and punched it out using my Scallop Punch. I also stamped the same image on WW CS in So Saffron Ink and punched that out using my 1 3/8" Circle Punch. I layered the WW onto the Pink with Dimensionals and adhered that onto the card. Last I punched 3 stars out of Barely Banana using the Small Star Punch and adhered those on to the card.


'Till next time. Thanks for looking!